There is not much to tell when it comes to creating a zip archive. Truth be told, this vendor documentation should get you over the line.
Still, there are a few twists in the tale when it comes to implementing real-world use cases. At the time of writing, these were not included in the linked article or anywhere else on the web that I could find. So I thought I would write this.
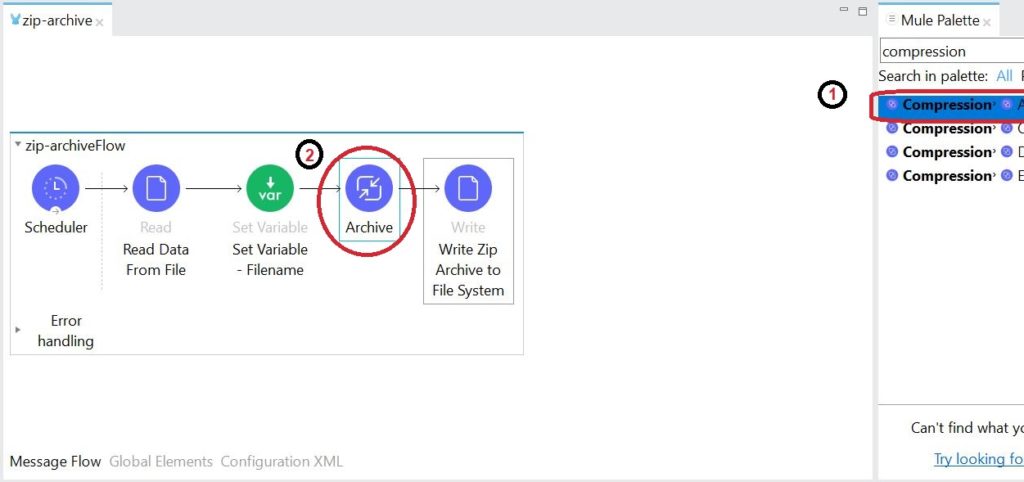
To create the flow below, do the following:
- Create a new Mule Project called zip-archive
- Drag a Flow onto your canvas and call it zip-archiveFlow
- Drag a Scheduler onto the flow Source and set the interval to 1 minute
- Drag a File Read component onto the flow and set File Path to a csv file on your file system
- The key component is the Archive component. To find this component, type compression in the Mule palette search box (see 1 & 2 in the image below).
- Then click and drag Compression | Archive on to your flow
- Finally, drag a File Write component onto your flow and set Path to a valid file location (E.g. C:/temp/output/myoutput.zip)
- Set Create Parent Directories to true (this to ensure that it creates any missing directories)
- Set Write Mode to OVERWRITE (actually this is the default)
The above flow runs on a schedule. Every time the flow runs it does the following:
- Reads csv data from a file
- Sets a variable with the file name (taken from message.attributes,fileName)
- Creates an archive
- Writes the output to a file called /temp/output/myoutput.zip
Now for the Dataweave. Click on the Archive component, and place the following code into the Entries box
{
‘readme.txt’: ‘some instructions to go with the data’,
‘data/myfile.csv’: payload
}
The above code creates two files and adds them to the archive. The first (readme.txt) is placed in the root and contains the following text, as shown above; some instructions to go with the data.
The second file is in a relative file path data/myfile.csv — and this will contain the actual file content in your source file.
Go ahead and run the application. You should see a zip file called myoutput.zip appear at your specified target location and it should conform to your specified archive structure.
However, in the real world, file names are not static. For instance, what if I need to inject my original file name into the archive — and what if the name changes from time to time in my real-world use case? What if I need to name my archive files on the fly? This is where many tutorials appeared to come up short when I first looked at this.
Pity because it is really quite easy.
The long-hand version is to inject the variable into your script as follows:
var filepath = ‘data/’ ++ vars.filename
—
{
‘readme.txt’: ‘some instructions to go with the data’,
‘$filepath’: payload
}
This achieves the result by fetching the flow variable, injecting it into the script and then using that in our output. There is a less verbose way of achieving this, however:
{
‘readme.txt’: ‘some instructions to go with the data’,
(‘data/’ ++ vars.filename): payload
}
NOTE: The brackets above are the key. Remove them and the expression will no longer work.